This year's badge is a simple design that has been created to test and develop your soldering skills...
The badge also has a purpose during the con:
🔴 Do not disturb
🟢 Looking for work
🟡 Looking to hire
🔵 It’s complex
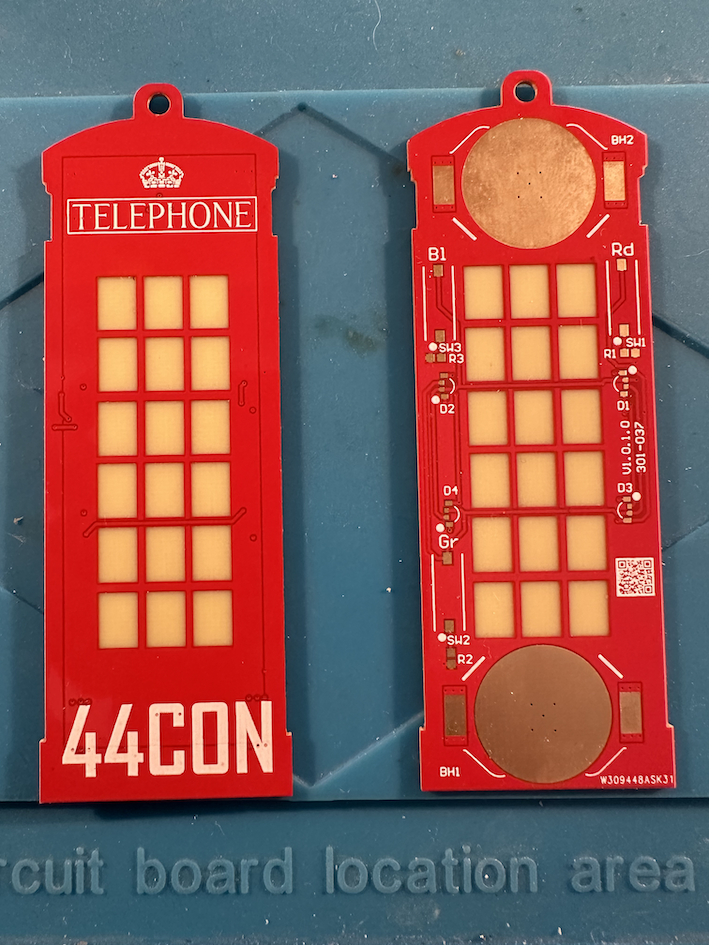
Components
The badge has some small surface mount components to solder, which require a steady hand.
These are:
4 x LED’s
3 x Resistors
3 x Switches
2 x Battery Holder
Schematic
The schematic can be downloaded from here.
How To
-
Start with soldering the resistors to the designators marked on the board R1, R2, R3
-
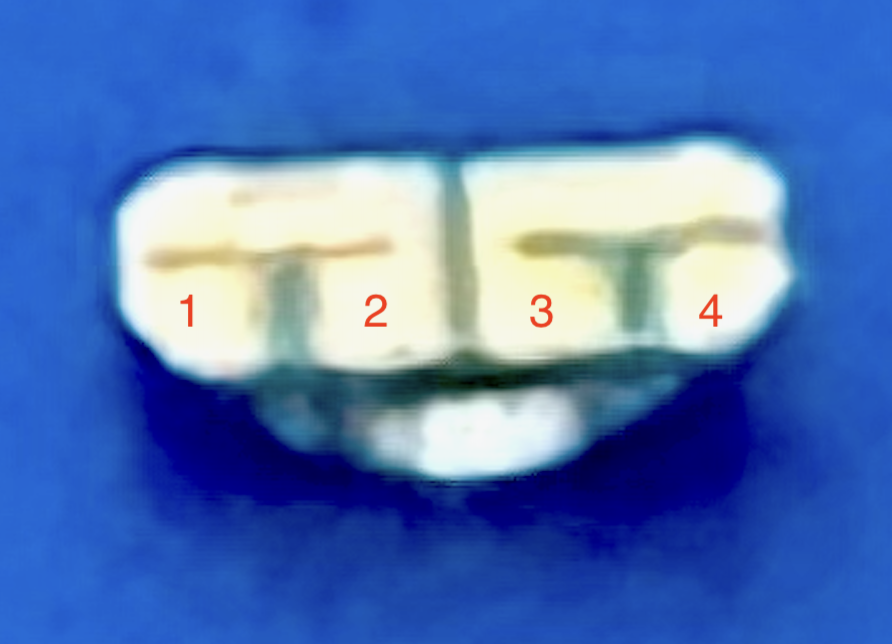
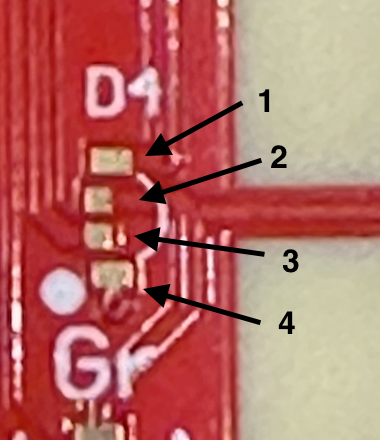
Next, solder the LEDs to D1, D2, D3, D4. The LED's must be solded the correct way up. The LED Dome should be facing inwards towards the window plane and the 4 Pads at the bottom of the LED must align with the 4 pads on the board. (See pictures below):
-
Next, solder the switches to SW1, SW2, SW3
-
Finally solder the battery holders to BH1 and BH2.
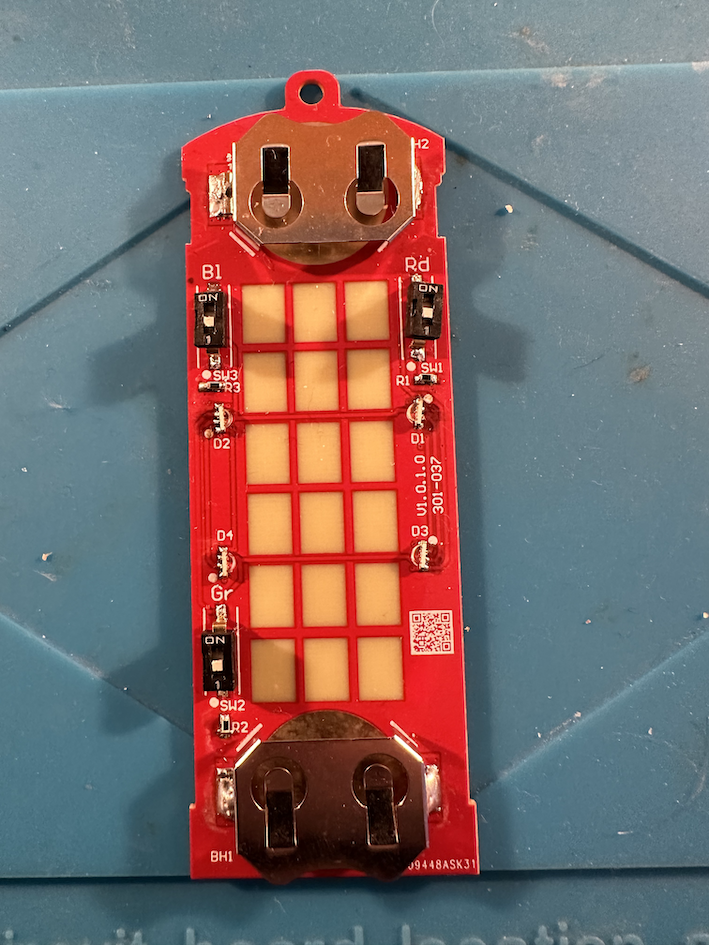
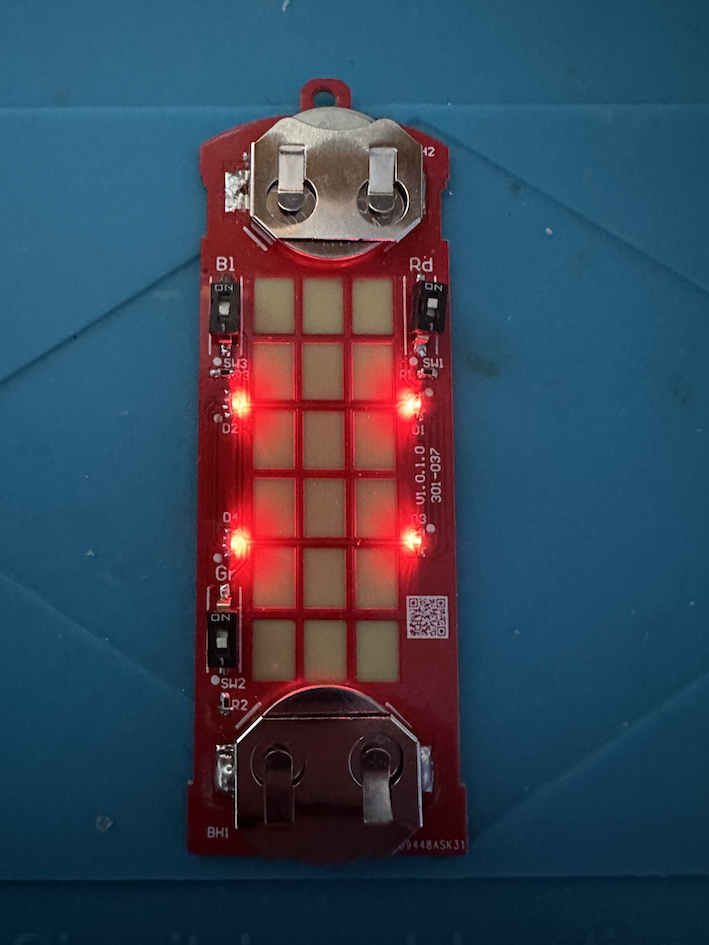
The finished badge should look like this:
Surface Mount Soldering Technique
To surface mount components use the following method:
-
Raise the pad where you wish to solder the first component by applying a small amount of solder to it.
-
Take your component and use some tweezers, move it into position, while using the iron to get the solder flowing on the pad, as it flows remove the iron and the component should hold.
-
Next, take a small amount of solder and touch it with the iron on the 2nd pad where the component is covering.
-
If you are soldering an LED, repeat for the 3rd and 4th connection being careful not to overlap the join.
Video Demo:
After The Con
Want to make the badge at home, here is the BOM from Mouser:
- LED's x4 Mouser P/N 710-155124M173200
- Switch x3 Mouser P/N 490-DS04254101BK-SMT
- Resistor x3 Mouser P/N 71-CRCW0805-2.2K-E3
- Battery Holder x2 Mouser P/N 712-BAT-HLD-001
Download the BoM from here.

